Saturday, July 30, 2016

ROM | Moto X2 | 6.0.1 | AOKP Android Open Kang Project | Não oficial | 30/08

Android Open Kang Project é uma distribuição personalizada de ROM para vários dispositivos Android high-end. O nome é uma mistura com a palavra Kang e AOSP (Android Open Source Project). O nome era uma espécie de piada, assim como nossa paixão com Unicórnios.

Screenshots:


Instalação:

1. Baixe a ROM e o GApps;
2. Coloque ambos na memória interna do seu Moto X;
3. Reinicie no modo Recovery;
4. Vá em Wipe > Advanced Wipe e selecione: System, cache, data e dalvik-cache;
5. Confirme o Wipe;
6. Vá em Install e selecione a ROM e confirme, depois selecione o GApps e confirme;
7. Agora vá em Reboot > System

Downloads:

AOKP | Victara | 30/08

Banks Gapps

Créditos:

@Anderson Mendes

Friday, July 29, 2016

Recovery | MotoX2 | TWRP Recovery Oficial | v3.0.2-2 | Victara

Obtenha o TWRP Recovery no seu Moto X 2° Geração!

Necessita de Bootloader desbloqueado!

Requisitos:

- Bootloader desbloqueado
- Drivers USB
- Bateria acima de 40%
- Funciona no 5.0, 5.1 e 6.0 (Testado e aprovado)

Tutorial:

1. Baixe o Recovery no seu PC;
2. Extraia o zip no seu PC;
3. Coloque seu Moto X2 em modo Fastboot (Power e volume p/ baixo por 5s);
4. Abra a pasta do Recovery e dê duplo clique no Instalador;
5. Siga o que se pede, dando enter;
6. No final seu aparelho irá reiniciar no Fastboot
7. No Fastboot va até "Recovery" e confirme com volume p/cima
8. Seu Moto X2 irá entrar no TWRP, depois é só ir em Reboot > System
9. Pronto!

Mudanças:

v3.0.2-0:
- Foi consertado um erro com as caixas de entrada de senhas, que afetava a descriptografia de backups criptografados.
- Adicionado a linguagem Grega
Traduzido por Rafael Julio
Downloads:

TWRP Recovery 3.0.2-2 | Victara


TWRP Recovery 2.8.7.1 | Victara

TWRP Recovery 2.8.7.0 | Victara

TWRP Recovery 2.8.6.0 | Victara

_________________________________________________

Drivers USB

Via: TeamWin

Wednesday, July 27, 2016

How to Hard Reset Sony Xperia X

Hard Reset Method for Sony Xperia X : How to

    1. Switch off your Sony Xperia X either by holding the Power key for a short while, or by removing the battery; whichever is possible.

    2. Press and hold the Volume Up and Power buttons together for some seconds.

    3. When the Android Robot or Sony Xperia logo is displayed on your Sony Xperia X screen, press the Camera key to enter Sony Recovery menu.

    4. Now, you should see the Wipe Data or Factory Reset option on your Sony Xperia X recovery screen.

    Confirm the whole process by choosing appropriate options.

    Use Volume rockers to scroll and Power button to confirm.

    5. Now Select " Yes ----- Delete All User Data " And Confirm with the Power key.

    6. Wait few minutes until your Sony Xperia X completes the wiping operation!

And by that, you have just hard reset your Sony Xperia X.


Sony Xperia Hard Reset

Factory Reset Guide for Sony Xperia X : method two

You can use this method to factory reset your Sony Xperia X provided that the phone still comes on normally and that it is not Password Locked.

    1. If your Sony Xperia X is turned off, turn on the device by Pressing the Power Key until it comes on.

    2. From the phone's Screen go to Dialer, and enter this string: *#*#7378423#*#* on the dialer.

    3. From the screen, tap Customization Settings and then, Reset Customization and confirm it.

    Wait few minutes until your Sony Xperia X reboots. By the time it boots on, all the data on the phone would have gone and the phone now back to its factory default settings.

Good. You have just performed a Factory Reset on your Sony Xperia X.


NOTE:

Hard Reset is the process of reverting your phone's settings to its factory defaults using some key combinations without going through the phone settings before doing so. While Factory Reset is the process of resetting your phone to its factory default settings while the phone is on Android Mode.


The end result of both method is to clear or wipe off your phone contents, in this case, your Sony Xperia X.


Factory Reset Method for Sony Xperia X: method 3, Menu Option

    1. Turn on Sony Xperia X if it's on

    2. Make sure you have enough battery to complete this operation on the phone.

    3. Go to menu: Setting > Backup and reset > Factory Data Reset > Reset Device

    4. Choose Erase Everything

Now, wait patiently until your Sony Xperia X reboots and reset to its factory default settings.


If this piece of info was useful to you, please share to help others.

Also, follow us on Facebook here, Twitter here and Google+ here.


Tecno S7 Stock ROM Download Link [MTK Backup]

Here is a stock ROM, MTK Backup for Tecno S7 which is also known as Tecno S-7.


With this Tecno S7 flash file, you can flash stock ROM back to your Tecno S7 using SP Flash Tool. This is mostly required when you have software issues with your Tecno android devices, and in most cases, flashing stock ROM on Tecno android devices corrects all software errors if you know how to do it.


Below here is the download link for the stock ROM. You may also see the tutorial page on how to flash stock ROM on Tecno and other MTK android devices below.


Tecno S7, S7 Stock ROM Download Details:
Version: --
ROM Size: -
S7 Stock ROM Download Link: Download Tecno S7 ROM Here

Recommended


Video Tutorial On How to Flash MTK Android


Source: List of All Tecno Android Device Stock ROM and Flash Files

Must Read:

How to Hard Reset LG Optimus 3D Max P720

Hard Reset Method for LG Optimus 3D Max P720 : How to

1. Switch off your LG Optimus 3D Max P720 either by holding the Power key for a short while, or by removing the battery; whichever is possible.


2. Press and hold the Volume Down and Power button together for some seconds.


3. When the LG logo is displayed, release the Power key and keep pressing the Volume Down.


4. While still holding the Volume Down key, tap the Power Key one more time.


5. Now, you should see the factory reset menu on your LG Optimus 3D Max P720 screen.

Confirm the whole process by choosing appropriate options.

Use Volume rockers to scroll and Power button to confirm.

6. Wait few minutes until your LG Optimus 3D Max P720 completes the wiping operation!


And by that, you have just hard reset your LG Optimus 3D Max P720.


Hard Reset

Factory Reset Guide for LG Optimus 3D Max P720 : How to

1. If your LG Optimus 3D Max P720 is turned off, turn on the device by Pressing the Power Key until it comes on.


2. From the phone's Main Menu go to Settings, General then Backup & Reset.


3. From the screen, tap Factory Data Reset and then, Reset Phone.

Choose Delete All if you are sure you want to clear all your data.

Then select OK to confirm the whole operation.


Good. You have just performed a Factory Reset on your LG Optimus 3D Max P720.


NOTE:

Hard Reset is the process of reverting your phone's settings to its factory defaults using some key combinations without going through the phone settings before doing so. While Factory Reset is the process of resetting your phone to its factory default settings while the phone is on Android Mode.


The end result of both method is to clear or wipe off your phone contents, in this case, your LG Optimus 3D Max P720.


If this piece of info was useful to you, please share to help others.

Also, follow us on Facebook here, Twitter here and Google+ here.


Tuesday, July 26, 2016

How to Enter Download Mode On LG Enlighten VS700

Download Mode is necessary when you need to unbrick a particular LG Android device or to be more specific, LG Enlighten VS700. You have to boot your LG android device to Download Mode so that LG Flash and Unbrick tools such as LGUP and LG Flash Tool maybe able to connect, recognise and communicate with your LG android device from the PC.


Booting LG Enlighten VS700 to Download Mode

The step by step guides given hereunder explains how to boot your LG Enlighten VS700 to Download Mode.


1. Download and Install LG Android USB Drivers from the Download Section here.


2. Power off your LG Enlighten VS700 or if possible, remove the battery from it.


3. Connect the compatible USB Cable for your LG Enlighten VS700 to the PC.


4. Press and Hold the Volume Up button of your LG Enlighten VS700. If you have removed the battery, insert the battery and then, while still holding the Volume Up button, connect the USB Cable to the phone.


6. Keep pressing the Volume Up button until an image similar to the one below appears on your LG Enlighten VS700 screen.


Good! That's your LG Download Mode! You can now use your favourite LG Service tools to unbrick, flash, downgrade or upgrade your LG Enlighten VS700.


Download Section

Download LG Android USB Drivers from here

How to Hard Reset Sony Xperia X Performance

Hard Reset Method for Sony Xperia X Performance : How to

    1. Switch off your Sony Xperia X Performance either by holding the Power key for a short while, or by removing the battery; whichever is possible.

    2. Press and hold the Volume Up and Power buttons together for some seconds.

    3. When the Android Robot or Sony Xperia logo is displayed on your Sony Xperia X Performance screen, press the Camera key to enter Sony Recovery menu.

    4. Now, you should see the Wipe Data or Factory Reset option on your Sony Xperia X Performance recovery screen.

    Confirm the whole process by choosing appropriate options.

    Use Volume rockers to scroll and Power button to confirm.

    5. Now Select " Yes ----- Delete All User Data " And Confirm with the Power key.

    6. Wait few minutes until your Sony Xperia X Performance completes the wiping operation!

And by that, you have just hard reset your Sony Xperia X Performance.


Sony Xperia Hard Reset

Factory Reset Guide for Sony Xperia X Performance : method two

You can use this method to factory reset your Sony Xperia X Performance provided that the phone still comes on normally and that it is not Password Locked.

    1. If your Sony Xperia X Performance is turned off, turn on the device by Pressing the Power Key until it comes on.

    2. From the phone's Screen go to Dialer, and enter this string: *#*#7378423#*#* on the dialer.

    3. From the screen, tap Customization Settings and then, Reset Customization and confirm it.

    Wait few minutes until your Sony Xperia X Performance reboots. By the time it boots on, all the data on the phone would have gone and the phone now back to its factory default settings.

Good. You have just performed a Factory Reset on your Sony Xperia X Performance.


NOTE:

Hard Reset is the process of reverting your phone's settings to its factory defaults using some key combinations without going through the phone settings before doing so. While Factory Reset is the process of resetting your phone to its factory default settings while the phone is on Android Mode.


The end result of both method is to clear or wipe off your phone contents, in this case, your Sony Xperia X Performance.


Factory Reset Method for Sony Xperia X Performance: method 3, Menu Option

    1. Turn on Sony Xperia X Performance if it's on

    2. Make sure you have enough battery to complete this operation on the phone.

    3. Go to menu: Setting > Backup and reset > Factory Data Reset > Reset Device

    4. Choose Erase Everything

Now, wait patiently until your Sony Xperia X Performance reboots and reset to its factory default settings.


If this piece of info was useful to you, please share to help others.

Also, follow us on Facebook here, Twitter here and Google+ here.


Tecno S5 Stock ROM Download Link [MTK Backup]

Here is a stock ROM, MTK Backup for Tecno S5 which is also known as Tecno S-5.


With this Tecno S5 flash file, you can flash stock ROM back to your Tecno S5 using SP Flash Tool. This is mostly required when you have software issues with your Tecno android devices, and in most cases, flashing stock ROM on Tecno android devices corrects all software errors if you know how to do it.


Below here is the download link for the stock ROM. You may also see the tutorial page on how to flash stock ROM on Tecno and other MTK android devices below.


Tecno S5, S5 Stock ROM Download Details:
Version: --
ROM Size: -
S5 Stock ROM Download Link: Download Tecno S5 ROM Here

Tutorials for Flashing Stock ROM On Tecno S5


Recommended


Video Tutorial On How to Flash MTK Android


Must Read:

How to Hard Reset LG Xpression C395

Hard Reset Method for LG Xpression C395 : How to

1. Switch off your LG Xpression C395 either by holding the Power key for a short while, or by removing the battery; whichever is possible.


2. Press and hold the Volume Down and Power button together for some seconds.


3. When the LG logo is displayed, release the Power key and keep pressing the Volume Down.


4. While still holding the Volume Down key, tap the Power Key one more time.


5. Now, you should see the factory reset menu on your LG Xpression C395 screen.

Confirm the whole process by choosing appropriate options.

Use Volume rockers to scroll and Power button to confirm.

6. Wait few minutes until your LG Xpression C395 completes the wiping operation!


And by that, you have just hard reset your LG Xpression C395.


Hard Reset

Factory Reset Guide for LG Xpression C395 : How to

1. If your LG Xpression C395 is turned off, turn on the device by Pressing the Power Key until it comes on.


2. From the phone's Main Menu go to Settings, General then Backup & Reset.


3. From the screen, tap Factory Data Reset and then, Reset Phone.

Choose Delete All if you are sure you want to clear all your data.

Then select OK to confirm the whole operation.


Good. You have just performed a Factory Reset on your LG Xpression C395.


NOTE:

Hard Reset is the process of reverting your phone's settings to its factory defaults using some key combinations without going through the phone settings before doing so. While Factory Reset is the process of resetting your phone to its factory default settings while the phone is on Android Mode.


The end result of both method is to clear or wipe off your phone contents, in this case, your LG Xpression C395.


If this piece of info was useful to you, please share to help others.

Also, follow us on Facebook here, Twitter here and Google+ here.


How to Enter Download Mode On LG Spectrum VS920

Download Mode is necessary when you need to unbrick a particular LG Android device or to be more specific, LG Spectrum VS920. You have to boot your LG android device to Download Mode so that LG Flash and Unbrick tools such as LGUP and LG Flash Tool maybe able to connect, recognise and communicate with your LG android device from the PC.


Booting LG Spectrum VS920 to Download Mode

The step by step guides given hereunder explains how to boot your LG Spectrum VS920 to Download Mode.


1. Download and Install LG Android USB Drivers from the Download Section here.


2. Power off your LG Spectrum VS920 or if possible, remove the battery from it.


3. Connect the compatible USB Cable for your LG Spectrum VS920 to the PC.


4. Press and Hold the Volume Up button of your LG Spectrum VS920. If you have removed the battery, insert the battery and then, while still holding the Volume Up button, connect the USB Cable to the phone.


6. Keep pressing the Volume Up button until an image similar to the one below appears on your LG Spectrum VS920 screen.


Good! That's your LG Download Mode! You can now use your favourite LG Service tools to unbrick, flash, downgrade or upgrade your LG Spectrum VS920.


Download Section

Download LG Android USB Drivers from here

How to Hard Reset Sony Xperia XA Ultra

Hard Reset Method for Sony Xperia XA Ultra : How to

    1. Switch off your Sony Xperia XA Ultra either by holding the Power key for a short while, or by removing the battery; whichever is possible.

    2. Press and hold the Volume Up and Power buttons together for some seconds.

    3. When the Android Robot or Sony Xperia logo is displayed on your Sony Xperia XA Ultra screen, press the Camera key to enter Sony Recovery menu.

    4. Now, you should see the Wipe Data or Factory Reset option on your Sony Xperia XA Ultra recovery screen.

    Confirm the whole process by choosing appropriate options.

    Use Volume rockers to scroll and Power button to confirm.

    5. Now Select " Yes ----- Delete All User Data " And Confirm with the Power key.

    6. Wait few minutes until your Sony Xperia XA Ultra completes the wiping operation!

And by that, you have just hard reset your Sony Xperia XA Ultra.


Sony Xperia Hard Reset

Factory Reset Guide for Sony Xperia XA Ultra : method two

You can use this method to factory reset your Sony Xperia XA Ultra provided that the phone still comes on normally and that it is not Password Locked.

    1. If your Sony Xperia XA Ultra is turned off, turn on the device by Pressing the Power Key until it comes on.

    2. From the phone's Screen go to Dialer, and enter this string: *#*#7378423#*#* on the dialer.

    3. From the screen, tap Customization Settings and then, Reset Customization and confirm it.

    Wait few minutes until your Sony Xperia XA Ultra reboots. By the time it boots on, all the data on the phone would have gone and the phone now back to its factory default settings.

Good. You have just performed a Factory Reset on your Sony Xperia XA Ultra.


NOTE:

Hard Reset is the process of reverting your phone's settings to its factory defaults using some key combinations without going through the phone settings before doing so. While Factory Reset is the process of resetting your phone to its factory default settings while the phone is on Android Mode.


The end result of both method is to clear or wipe off your phone contents, in this case, your Sony Xperia XA Ultra.


Factory Reset Method for Sony Xperia XA Ultra: method 3, Menu Option

    1. Turn on Sony Xperia XA Ultra if it's on

    2. Make sure you have enough battery to complete this operation on the phone.

    3. Go to menu: Setting > Backup and reset > Factory Data Reset > Reset Device

    4. Choose Erase Everything

Now, wait patiently until your Sony Xperia XA Ultra reboots and reset to its factory default settings.


If this piece of info was useful to you, please share to help others.

Also, follow us on Facebook here, Twitter here and Google+ here.


How to Hard Reset Sony Xperia E5

Hard Reset Method for Sony Xperia E5 : How to

    1. Switch off your Sony Xperia E5 either by holding the Power key for a short while, or by removing the battery; whichever is possible.

    2. Press and hold the Volume Up and Power buttons together for some seconds.

    3. When the Android Robot or Sony Xperia logo is displayed on your Sony Xperia E5 screen, press the Camera key to enter Sony Recovery menu.

    4. Now, you should see the Wipe Data or Factory Reset option on your Sony Xperia E5 recovery screen.

    Confirm the whole process by choosing appropriate options.

    Use Volume rockers to scroll and Power button to confirm.

    5. Now Select " Yes ----- Delete All User Data " And Confirm with the Power key.

    6. Wait few minutes until your Sony Xperia E5 completes the wiping operation!

And by that, you have just hard reset your Sony Xperia E5.


Sony Xperia Hard Reset

Factory Reset Guide for Sony Xperia E5 : method two

You can use this method to factory reset your Sony Xperia E5 provided that the phone still comes on normally and that it is not Password Locked.

    1. If your Sony Xperia E5 is turned off, turn on the device by Pressing the Power Key until it comes on.

    2. From the phone's Screen go to Dialer, and enter this string: *#*#7378423#*#* on the dialer.

    3. From the screen, tap Customization Settings and then, Reset Customization and confirm it.

    Wait few minutes until your Sony Xperia E5 reboots. By the time it boots on, all the data on the phone would have gone and the phone now back to its factory default settings.

Good. You have just performed a Factory Reset on your Sony Xperia E5.


NOTE:

Hard Reset is the process of reverting your phone's settings to its factory defaults using some key combinations without going through the phone settings before doing so. While Factory Reset is the process of resetting your phone to its factory default settings while the phone is on Android Mode.


The end result of both method is to clear or wipe off your phone contents, in this case, your Sony Xperia E5.


Factory Reset Method for Sony Xperia E5: method 3, Menu Option

    1. Turn on Sony Xperia E5 if it's on

    2. Make sure you have enough battery to complete this operation on the phone.

    3. Go to menu: Setting > Backup and reset > Factory Data Reset > Reset Device

    4. Choose Erase Everything

Now, wait patiently until your Sony Xperia E5 reboots and reset to its factory default settings.


If this piece of info was useful to you, please share to help others.

Also, follow us on Facebook here, Twitter here and Google+ here.


Monday, July 25, 2016

How to Hard Reset LG Optimus True HD LTE P936

Hard Reset Method for LG Optimus True HD LTE P936 : How to

1. Switch off your LG Optimus True HD LTE P936 either by holding the Power key for a short while, or by removing the battery; whichever is possible.


2. Press and hold the Volume Down and Power button together for some seconds.


3. When the LG logo is displayed, release the Power key and keep pressing the Volume Down.


4. While still holding the Volume Down key, tap the Power Key one more time.


5. Now, you should see the factory reset menu on your LG Optimus True HD LTE P936 screen.

Confirm the whole process by choosing appropriate options.

Use Volume rockers to scroll and Power button to confirm.

6. Wait few minutes until your LG Optimus True HD LTE P936 completes the wiping operation!


And by that, you have just hard reset your LG Optimus True HD LTE P936.


Hard Reset

Factory Reset Guide for LG Optimus True HD LTE P936 : How to

1. If your LG Optimus True HD LTE P936 is turned off, turn on the device by Pressing the Power Key until it comes on.


2. From the phone's Main Menu go to Settings, General then Backup & Reset.


3. From the screen, tap Factory Data Reset and then, Reset Phone.

Choose Delete All if you are sure you want to clear all your data.

Then select OK to confirm the whole operation.


Good. You have just performed a Factory Reset on your LG Optimus True HD LTE P936.


NOTE:

Hard Reset is the process of reverting your phone's settings to its factory defaults using some key combinations without going through the phone settings before doing so. While Factory Reset is the process of resetting your phone to its factory default settings while the phone is on Android Mode.


The end result of both method is to clear or wipe off your phone contents, in this case, your LG Optimus True HD LTE P936.


If this piece of info was useful to you, please share to help others.

Also, follow us on Facebook here, Twitter here and Google+ here.


How to Enter Download Mode On LG Connect 4G MS840

Download Mode is necessary when you need to unbrick a particular LG Android device or to be more specific, LG Connect 4G MS840. You have to boot your LG android device to Download Mode so that LG Flash and Unbrick tools such as LGUP and LG Flash Tool maybe able to connect, recognise and communicate with your LG android device from the PC.


Booting LG Connect 4G MS840 to Download Mode

The step by step guides given hereunder explains how to boot your LG Connect 4G MS840 to Download Mode.


1. Download and Install LG Android USB Drivers from the Download Section here.


2. Power off your LG Connect 4G MS840 or if possible, remove the battery from it.


3. Connect the compatible USB Cable for your LG Connect 4G MS840 to the PC.


4. Press and Hold the Volume Up button of your LG Connect 4G MS840. If you have removed the battery, insert the battery and then, while still holding the Volume Up button, connect the USB Cable to the phone.


6. Keep pressing the Volume Up button until an image similar to the one below appears on your LG Connect 4G MS840 screen.


Good! That's your LG Download Mode! You can now use your favourite LG Service tools to unbrick, flash, downgrade or upgrade your LG Connect 4G MS840.


Download Section

Download LG Android USB Drivers from here

Tecno S3 Stock ROM Download Link [MTK Backup]

Here is a stock ROM, MTK Backup for Tecno S3 which is also known as Tecno S-3.


With this Tecno S3 flash file, you can flash stock ROM back to your Tecno S3 using SP Flash Tool. This is mostly required when you have software issues with your Tecno android devices, and in most cases, flashing stock ROM on Tecno android devices corrects all software errors if you know how to do it.


Below here is the download link for the stock ROM. You may also see the tutorial page on how to flash stock ROM on Tecno and other MTK android devices below.


Tecno S3, S3 Stock ROM Download Details:
Version: --
ROM Size: -
S3 Stock ROM Download Link: Download Tecno S3 ROM Here

Tutorials for Flashing Stock ROM On Tecno S3


Recommended


Video Tutorial On How to Flash MTK Android


Must Read:

How to Hard Reset LG Splendor US730

Hard Reset Method for LG Splendor US730 : How to

1. Switch off your LG Splendor US730 either by holding the Power key for a short while, or by removing the battery; whichever is possible.


2. Press and hold the Volume Down and Power button together for some seconds.


3. When the LG logo is displayed, release the Power key and keep pressing the Volume Down.


4. While still holding the Volume Down key, tap the Power Key one more time.


5. Now, you should see the factory reset menu on your LG Splendor US730 screen.

Confirm the whole process by choosing appropriate options.

Use Volume rockers to scroll and Power button to confirm.

6. Wait few minutes until your LG Splendor US730 completes the wiping operation!


And by that, you have just hard reset your LG Splendor US730.


Hard Reset

Factory Reset Guide for LG Splendor US730 : How to

1. If your LG Splendor US730 is turned off, turn on the device by Pressing the Power Key until it comes on.


2. From the phone's Main Menu go to Settings, General then Backup & Reset.


3. From the screen, tap Factory Data Reset and then, Reset Phone.

Choose Delete All if you are sure you want to clear all your data.

Then select OK to confirm the whole operation.


Good. You have just performed a Factory Reset on your LG Splendor US730.


NOTE:

Hard Reset is the process of reverting your phone's settings to its factory defaults using some key combinations without going through the phone settings before doing so. While Factory Reset is the process of resetting your phone to its factory default settings while the phone is on Android Mode.


The end result of both method is to clear or wipe off your phone contents, in this case, your LG Splendor US730.


If this piece of info was useful to you, please share to help others.

Also, follow us on Facebook here, Twitter here and Google+ here.


How to Enter Download Mode On LG Optimus Pad LTE

Download Mode is necessary when you need to unbrick a particular LG Android device or to be more specific, LG Optimus Pad LTE. You have to boot your LG android device to Download Mode so that LG Flash and Unbrick tools such as LGUP and LG Flash Tool maybe able to connect, recognise and communicate with your LG android device from the PC.


Booting LG Optimus Pad LTE to Download Mode

The step by step guides given hereunder explains how to boot your LG Optimus Pad LTE to Download Mode.


1. Download and Install LG Android USB Drivers from the Download Section here.


2. Power off your LG Optimus Pad LTE or if possible, remove the battery from it.


3. Connect the compatible USB Cable for your LG Optimus Pad LTE to the PC.


4. Press and Hold the Volume Up button of your LG Optimus Pad LTE. If you have removed the battery, insert the battery and then, while still holding the Volume Up button, connect the USB Cable to the phone.


6. Keep pressing the Volume Up button until an image similar to the one below appears on your LG Optimus Pad LTE screen.


Good! That's your LG Download Mode! You can now use your favourite LG Service tools to unbrick, flash, downgrade or upgrade your LG Optimus Pad LTE.


Download Section

Download LG Android USB Drivers from here

Episode 066


The 66th show of the Geeks Amok Podcast is done and is officially in the history books!

LeRoy and Frank discuss the geek news!

Follow us on Twitch and Subscribe on YouTube!
Read more »

Tecno R7 Stock ROM Download Link [MTK Backup]

Here is a stock ROM, MTK Backup for Tecno R7 which is also known as Tecno R-7.


With this Tecno R7 flash file, you can flash stock ROM back to your Tecno R7 using SP Flash Tool. This is mostly required when you have software issues with your Tecno android devices, and in most cases, flashing stock ROM on Tecno android devices corrects all software errors if you know how to do it.


Below here is the download link for the stock ROM. You may also see the tutorial page on how to flash stock ROM on Tecno and other MTK android devices below.


Tecno R7, R7 Stock ROM Download Details:
Version: --
ROM Size: -
R7 Stock ROM Download Link: Download Tecno R7 ROM Here

Tutorials for Flashing Stock ROM On Tecno R7


Recommended


Video Tutorial On How to Flash MTK Android


Must Read:

How to Enter Download Mode LG Optimus LTE Tag

Download Mode is necessary when you need to unbrick a particular LG Android device or to be more specific, LG Optimus LTE Tag. You have to boot your LG android device to Download Mode so that LG Flash and Unbrick tools such as LGUP and LG Flash Tool maybe able to connect, recognise and communicate with your LG android device from the PC.


Booting LG Optimus LTE Tag to Download Mode

The step by step guides given hereunder explains how to boot your LG Optimus LTE Tag to Download Mode.


1. Download and Install LG Android USB Drivers from the Download Section here.


2. Power off your LG Optimus LTE Tag or if possible, remove the battery from it.


3. Connect the compatible USB Cable for your LG Optimus LTE Tag to the PC.


4. Press and Hold the Volume Up button of your LG Optimus LTE Tag. If you have removed the battery, insert the battery and then, while still holding the Volume Up button, connect the USB Cable to the phone.


6. Keep pressing the Volume Up button until an image similar to the one below appears on your LG Optimus LTE Tag screen.


Good! That's your LG Download Mode! You can now use your favourite LG Service tools to unbrick, flash, downgrade or upgrade your LG Optimus LTE Tag.


Download Section

Download LG Android USB Drivers from here

How to Hard Reset LG Optimus LTE Tag

Hard Reset Method for LG Optimus LTE Tag : How to

1. Switch off your LG Optimus LTE Tag either by holding the Power key for a short while, or by removing the battery; whichever is possible.


2. Press and hold the Volume Down and Power button together for some seconds.


3. When the LG logo is displayed, release the Power key and keep pressing the Volume Down.


4. While still holding the Volume Down key, tap the Power Key one more time.


5. Now, you should see the factory reset menu on your LG Optimus LTE Tag screen.

Confirm the whole process by choosing appropriate options.

Use Volume rockers to scroll and Power button to confirm.

6. Wait few minutes until your LG Optimus LTE Tag completes the wiping operation!


And by that, you have just hard reset your LG Optimus LTE Tag.


Hard Reset

Factory Reset Guide for LG Optimus LTE Tag : How to

1. If your LG Optimus LTE Tag is turned off, turn on the device by Pressing the Power Key until it comes on.


2. From the phone's Main Menu go to Settings, General then Backup & Reset.


3. From the screen, tap Factory Data Reset and then, Reset Phone.

Choose Delete All if you are sure you want to clear all your data.

Then select OK to confirm the whole operation.


Good. You have just performed a Factory Reset on your LG Optimus LTE Tag.


NOTE:

Hard Reset is the process of reverting your phone's settings to its factory defaults using some key combinations without going through the phone settings before doing so. While Factory Reset is the process of resetting your phone to its factory default settings while the phone is on Android Mode.


The end result of both method is to clear or wipe off your phone contents, in this case, your LG Optimus LTE Tag.


If this piece of info was useful to you, please share to help others.

Also, follow us on Facebook here, Twitter here and Google+ here.


How to Hard Reset LG Optimus L5 E615 DUAL

Hard Reset Method for LG Optimus L5 Dual E615 : How to

1. Switch off your LG Optimus L5 Dual E615 either by holding the Power key for a short while, or by removing the battery; whichever is possible.


2. Press and hold the Volume Down and Power button together for some seconds.


3. When the LG logo is displayed, release the Power key and keep pressing the Volume Down.


4. While still holding the Volume Down key, tap the Power Key one more time.


5. Now, you should see the factory reset menu on your LG Optimus L5 Dual E615 screen.

Confirm the whole process by choosing appropriate options.

Use Volume rockers to scroll and Power button to confirm.

6. Wait few minutes until your LG Optimus L5 Dual E615 completes the wiping operation!


And by that, you have just hard reset your LG Optimus L5 Dual E615.


Hard Reset

Factory Reset Guide for LG Optimus L5 Dual E615 : How to

1. If your LG Optimus L5 Dual E615 is turned off, turn on the device by Pressing the Power Key until it comes on.


2. From the phone's Main Menu go to Settings, General then Backup & Reset.


3. From the screen, tap Factory Data Reset and then, Reset Phone.

Choose Delete All if you are sure you want to clear all your data.

Then select OK to confirm the whole operation.


Good. You have just performed a Factory Reset on your LG Optimus L5 Dual E615.


NOTE:

Hard Reset is the process of reverting your phone's settings to its factory defaults using some key combinations without going through the phone settings before doing so. While Factory Reset is the process of resetting your phone to its factory default settings while the phone is on Android Mode.


The end result of both method is to clear or wipe off your phone contents, in this case, your LG Optimus L5 Dual E615.


If this piece of info was useful to you, please share to help others.

Also, follow us on Facebook here, Twitter here and Google+ here.


Tecno R5 Stock ROM Download Link [MTK Backup]

Here is a stock ROM, MTK Backup for Tecno R5 which is also known as Tecno R-5.


With this Tecno R5 flash file, you can flash stock ROM back to your Tecno R5 using SP Flash Tool. This is mostly required when you have software issues with your Tecno android devices, and in most cases, flashing stock ROM on Tecno android devices corrects all software errors if you know how to do it.


Below here is the download link for the stock ROM. You may also see the tutorial page on how to flash stock ROM on Tecno and other MTK android devices below.


Tecno R5, R5 Stock ROM Download Details:
Version: --
ROM Size: -
R5 Stock ROM Download Link: Download Tecno R5 ROM Here

Tutorials for Flashing Stock ROM On Tecno R5


Recommended


Video Tutorial On How to Flash MTK Android


Must Read:

How to Enter Download Mode On LG Optimus L5 E610

Download Mode is necessary when you need to unbrick a particular LG Android device or to be more specific, LG Optimus L5 E610. You have to boot your LG android device to Download Mode so that LG Flash and Unbrick tools such as LGUP and LG Flash Tool maybe able to connect, recognise and communicate with your LG android device from the PC.


Booting LG Optimus L5 E610 to Download Mode

The step by step guides given hereunder explains how to boot your LG Optimus L5 E610 to Download Mode.


1. Download and Install LG Android USB Drivers from the Download Section here.


2. Power off your LG Optimus L5 E610 or if possible, remove the battery from it.


3. Connect the compatible USB Cable for your LG Optimus L5 E610 to the PC.


4. Press and Hold the Volume Up button of your LG Optimus L5 E610. If you have removed the battery, insert the battery and then, while still holding the Volume Up button, connect the USB Cable to the phone.


6. Keep pressing the Volume Up button until an image similar to the one below appears on your LG Optimus L5 E610 screen.


Good! That's your LG Download Mode! You can now use your favourite LG Service tools to unbrick, flash, downgrade or upgrade your LG Optimus L5 E610.


Download Section

Download LG Android USB Drivers from here

How to Hard Reset LG Optimus G LS970

Hard Reset Method for LG Optimus G LS970 : How to

1. Switch off your LG Optimus G LS970 either by holding the Power key for a short while, or by removing the battery; whichever is possible.


2. Press and hold the Volume Down and Power button together for some seconds.


3. When the LG logo is displayed, release the Power key and keep pressing the Volume Down.


4. While still holding the Volume Down key, tap the Power Key one more time.


5. Now, you should see the factory reset menu on your LG Optimus G LS970 screen.

Confirm the whole process by choosing appropriate options.

Use Volume rockers to scroll and Power button to confirm.

6. Wait few minutes until your LG Optimus G LS970 completes the wiping operation!


And by that, you have just hard reset your LG Optimus G LS970.


Hard Reset

Factory Reset Guide for LG Optimus G LS970 : How to

1. If your LG Optimus G LS970 is turned off, turn on the device by Pressing the Power Key until it comes on.


2. From the phone's Main Menu go to Settings, General then Backup & Reset.


3. From the screen, tap Factory Data Reset and then, Reset Phone.

Choose Delete All if you are sure you want to clear all your data.

Then select OK to confirm the whole operation.


Good. You have just performed a Factory Reset on your LG Optimus G LS970.


NOTE:

Hard Reset is the process of reverting your phone's settings to its factory defaults using some key combinations without going through the phone settings before doing so. While Factory Reset is the process of resetting your phone to its factory default settings while the phone is on Android Mode.


The end result of both method is to clear or wipe off your phone contents, in this case, your LG Optimus G LS970.


If this piece of info was useful to you, please share to help others.

Also, follow us on Facebook here, Twitter here and Google+ here.


Tecno Q1 Stock ROM Download Link [MTK Backup]

Here is a stock ROM, MTK Backup for Tecno Q1 which is also known as Tecno Q-1.


With this Tecno Q1 flash file, you can flash stock ROM back to your Tecno Q1 using SP Flash Tool. This is mostly required when you have software issues with your Tecno android devices, and in most cases, flashing stock ROM on Tecno android devices corrects all software errors if you know how to do it.


Below here is the download link for the stock ROM. You may also see the tutorial page on how to flash stock ROM on Tecno and other MTK android devices below.


Tecno Q1, Q1 Stock ROM Download Details:
Version: --
ROM Size: -
Q1 Stock ROM Download Link: Download Tecno Q1 ROM Here

Tutorials for Flashing Stock ROM On Tecno Q1


Recommended


Video Tutorial On How to Flash MTK Android


Must Read:

How to Enter Download Mode On LG Optimus 3D Cube SU870

Download Mode is necessary when you need to unbrick a particular LG Android device or to be more specific, LG Optimus 3D Cube SU870. You have to boot your LG android device to Download Mode so that LG Flash and Unbrick tools such as LGUP and LG Flash Tool maybe able to connect, recognise and communicate with your LG android device from the PC.


Booting LG Optimus 3D Cube SU870 to Download Mode

The step by step guides given hereunder explains how to boot your LG Optimus 3D Cube SU870 to Download Mode.


1. Download and Install LG Android USB Drivers from the Download Section here.


2. Power off your LG Optimus 3D Cube SU870 or if possible, remove the battery from it.


3. Connect the compatible USB Cable for your LG Optimus 3D Cube SU870 to the PC.


4. Press and Hold the Volume Up button of your LG Optimus 3D Cube SU870. If you have removed the battery, insert the battery and then, while still holding the Volume Up button, connect the USB Cable to the phone.


6. Keep pressing the Volume Up button until an image similar to the one below appears on your LG Optimus 3D Cube SU870 screen.


Good! That's your LG Download Mode! You can now use your favourite LG Service tools to unbrick, flash, downgrade or upgrade your LG Optimus 3D Cube SU870.


Download Section

Download LG Android USB Drivers from here

How to Hard Reset LG Spectrum II 4G VS930

Hard Reset Method for LG Spectrum II 4G VS930 : How to

1. Switch off your LG Spectrum II 4G VS930 either by holding the Power key for a short while, or by removing the battery; whichever is possible.


2. Press and hold the Volume Down and Power button together for some seconds.


3. When the LG logo is displayed, release the Power key and keep pressing the Volume Down.


4. While still holding the Volume Down key, tap the Power Key one more time.


5. Now, you should see the factory reset menu on your LG Spectrum II 4G VS930 screen.

Confirm the whole process by choosing appropriate options.

Use Volume rockers to scroll and Power button to confirm.

6. Wait few minutes until your LG Spectrum II 4G VS930 completes the wiping operation!


And by that, you have just hard reset your LG Spectrum II 4G VS930.


Hard Reset

Factory Reset Guide for LG Spectrum II 4G VS930 : How to

1. If your LG Spectrum II 4G VS930 is turned off, turn on the device by Pressing the Power Key until it comes on.


2. From the phone's Main Menu go to Settings, General then Backup & Reset.


3. From the screen, tap Factory Data Reset and then, Reset Phone.

Choose Delete All if you are sure you want to clear all your data.

Then select OK to confirm the whole operation.


Good. You have just performed a Factory Reset on your LG Spectrum II 4G VS930.


NOTE:

Hard Reset is the process of reverting your phone's settings to its factory defaults using some key combinations without going through the phone settings before doing so. While Factory Reset is the process of resetting your phone to its factory default settings while the phone is on Android Mode.


The end result of both method is to clear or wipe off your phone contents, in this case, your LG Spectrum II 4G VS930.


If this piece of info was useful to you, please share to help others.

Also, follow us on Facebook here, Twitter here and Google+ here.


Tecno P9 Stock ROM Download Link [Android Version 4.4 MTK Backup]

Here is a stock ROM, MTK Backup for Tecno P9 (Android Version 4.4) which is also known as Tecno P-9.


With this Tecno P9 (Android Version 4.4) flash file, you can flash stock ROM back to your Tecno P9 (Android Version 4.4) using SP Flash Tool. This is mostly required when you have software issues with your Tecno android devices, and in most cases, flashing stock ROM on Tecno android devices corrects all software errors if you know how to do it.


Below here is the download link for the stock ROM. You may also see the tutorial page on how to flash stock ROM on Tecno and other MTK android devices below.


Tecno P9 (Android Version 4.4), P9 (Android Version 4.4) Stock ROM Download Details:
Version: --
ROM Size: -
P9 (Android Version 4.4) Stock ROM Download Link: Download Tecno P9 (Android Version 4.4) ROM Here

Tutorials for Flashing Stock ROM On Tecno P9 (Android Version 4.4)


Recommended


Video Tutorial On How to Flash MTK Android


Must Read:

How to Enter Download Mode On LG Optimus True HD LTE P936

Download Mode is necessary when you need to unbrick a particular LG Android device or to be more specific, LG Optimus True HD LTE P936. You have to boot your LG android device to Download Mode so that LG Flash and Unbrick tools such as LGUP and LG Flash Tool maybe able to connect, recognise and communicate with your LG android device from the PC.


Booting LG Optimus True HD LTE P936 to Download Mode

The step by step guides given hereunder explains how to boot your LG Optimus True HD LTE P936 to Download Mode.


1. Download and Install LG Android USB Drivers from the Download Section here.


2. Power off your LG Optimus True HD LTE P936 or if possible, remove the battery from it.


3. Connect the compatible USB Cable for your LG Optimus True HD LTE P936 to the PC.


4. Press and Hold the Volume Up button of your LG Optimus True HD LTE P936. If you have removed the battery, insert the battery and then, while still holding the Volume Up button, connect the USB Cable to the phone.


6. Keep pressing the Volume Up button until an image similar to the one below appears on your LG Optimus True HD LTE P936 screen.


Good! That's your LG Download Mode! You can now use your favourite LG Service tools to unbrick, flash, downgrade or upgrade your LG Optimus True HD LTE P936.


Download Section

Download LG Android USB Drivers from here

How to Hard Reset LG Optimus L1 II E410

Hard Reset Method for LG Optimus L1 II E410 : How to

1. Switch off your LG Optimus L1 II E410 either by holding the Power key for a short while, or by removing the battery; whichever is possible.


2. Press and hold the Volume Down and Power button together for some seconds.


3. When the LG logo is displayed, release the Power key and keep pressing the Volume Down.


4. While still holding the Volume Down key, tap the Power Key one more time.


5. Now, you should see the factory reset menu on your LG Optimus L1 II E410 screen.

Confirm the whole process by choosing appropriate options.

Use Volume rockers to scroll and Power button to confirm.

6. Wait few minutes until your LG Optimus L1 II E410 completes the wiping operation!


And by that, you have just hard reset your LG Optimus L1 II E410.


Hard Reset

Factory Reset Guide for LG Optimus L1 II E410 : How to

1. If your LG Optimus L1 II E410 is turned off, turn on the device by Pressing the Power Key until it comes on.


2. From the phone's Main Menu go to Settings, General then Backup & Reset.


3. From the screen, tap Factory Data Reset and then, Reset Phone.

Choose Delete All if you are sure you want to clear all your data.

Then select OK to confirm the whole operation.


Good. You have just performed a Factory Reset on your LG Optimus L1 II E410.


NOTE:

Hard Reset is the process of reverting your phone's settings to its factory defaults using some key combinations without going through the phone settings before doing so. While Factory Reset is the process of resetting your phone to its factory default settings while the phone is on Android Mode.


The end result of both method is to clear or wipe off your phone contents, in this case, your LG Optimus L1 II E410.


If this piece of info was useful to you, please share to help others.

Also, follow us on Facebook here, Twitter here and Google+ here.
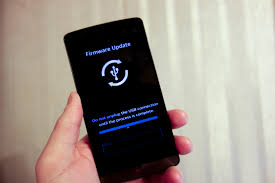

How to Enter Download Mode On LG Optimus L3 E405

Download Mode is necessary when you need to unbrick a particular LG Android device or to be more specific, LG Optimus L3 E405. You have to boot your LG android device to Download Mode so that LG Flash and Unbrick tools such as LGUP and LG Flash Tool maybe able to connect, recognise and communicate with your LG android device from the PC.


Booting LG Optimus L3 E405 to Download Mode

The step by step guides given hereunder explains how to boot your LG Optimus L3 E405 to Download Mode.


1. Download and Install LG Android USB Drivers from the Download Section here.


2. Power off your LG Optimus L3 E405 or if possible, remove the battery from it.


3. Connect the compatible USB Cable for your LG Optimus L3 E405 to the PC.


4. Press and Hold the Volume Up button of your LG Optimus L3 E405. If you have removed the battery, insert the battery and then, while still holding the Volume Up button, connect the USB Cable to the phone.


6. Keep pressing the Volume Up button until an image similar to the one below appears on your LG Optimus L3 E405 screen.


Good! That's your LG Download Mode! You can now use your favourite LG Service tools to unbrick, flash, downgrade or upgrade your LG Optimus L3 E405.


Download Section

Download LG Android USB Drivers from here

Sunday, July 24, 2016

Tecno P9 Stock ROM Download Link (Android 4.2 MTK Backup)

Here is a stock ROM, MTK Backup for Tecno P9 (Android Version 4.2) which is also known as Tecno P-9.


With this Tecno P9 (Android Version 4.2) flash file, you can flash stock ROM back to your Tecno P9 (Android Version 4.2) using SP Flash Tool. This is mostly required when you have software issues with your Tecno android devices, and in most cases, flashing stock ROM on Tecno android devices corrects all software errors if you know how to do it.


Below here is the download link for the stock ROM. You may also see the tutorial page on how to flash stock ROM on Tecno and other MTK android devices below.


Tecno P9 (Android Version 4.2), P9 (Android Version 4.2) Stock ROM Download Details:
Version: --
ROM Size: -
P9 (Android Version 4.2) Stock ROM Download Link: Download Tecno P9 (Android Version 4.2) ROM Here

Tutorials for Flashing Stock ROM On Tecno P9 (Android Version 4.2)


Recommended


Video Tutorial On How to Flash MTK Android


Must Read:

How to Hard Reset LG Optimus L3 II Dual E435

Hard Reset Method for LG Optimus L3 II Dual E435 : How to

1. Switch off your LG Optimus L3 II Dual E435 either by holding the Power key for a short while, or by removing the battery; whichever is possible.


2. Press and hold the Volume Down and Power button together for some seconds.


3. When the LG logo is displayed, release the Power key and keep pressing the Volume Down.


4. While still holding the Volume Down key, tap the Power Key one more time.


5. Now, you should see the factory reset menu on your LG Optimus L3 II Dual E435 screen.

Confirm the whole process by choosing appropriate options.

Use Volume rockers to scroll and Power button to confirm.

6. Wait few minutes until your LG Optimus L3 II Dual E435 completes the wiping operation!


And by that, you have just hard reset your LG Optimus L3 II Dual E435.


Hard Reset

Factory Reset Guide for LG Optimus L3 II Dual E435 : How to

1. If your LG Optimus L3 II Dual E435 is turned off, turn on the device by Pressing the Power Key until it comes on.


2. From the phone's Main Menu go to Settings, General then Backup & Reset.


3. From the screen, tap Factory Data Reset and then, Reset Phone.

Choose Delete All if you are sure you want to clear all your data.

Then select OK to confirm the whole operation.


Good. You have just performed a Factory Reset on your LG Optimus L3 II Dual E435.


NOTE:

Hard Reset is the process of reverting your phone's settings to its factory defaults using some key combinations without going through the phone settings before doing so. While Factory Reset is the process of resetting your phone to its factory default settings while the phone is on Android Mode.


The end result of both method is to clear or wipe off your phone contents, in this case, your LG Optimus L3 II Dual E435.


If this piece of info was useful to you, please share to help others.

Also, follow us on Facebook here, Twitter here and Google+ here.