If you have stayed with different bricked Qualcomm Android devices long enough, you will understand that different solutions apply to different Qualcomm Android devices in different bricked state.
And more often than not, you may have to apply at least, 2 different unbrick (debrick) methods before most bricked Qualcomm devices could be recovered from the brick state.
Exaple
- Let's say you have a Xiaomi Redmi Note 3 (Pro) that's stuck at Qualcomm QHSUSB_Bulk or Qualcomm QDLoader 9008 bricked state and needs to be recovered.. First, you might have to get it out of the QHSUSB_Bulk mode first then, flash it using MiFlash, Tool Studio eMMC Download tool or QFIL (QPST) and that is if your Redmi Note 3 eMMC is not corrupted else, you'll have one more step to take!
That's enough an intro! Now, how can you unbrick (debrick) your Qualcomm android device using your SD Card?
What Does this Method Do?
1. This method turns your SD Card to a bootable partition that can be mounted by your device so that Qualcomm flash tools such as QFIL, TooL Studio and others can detect it.
2. Even completely DEAD Qualcomm android device will be awaken and be detected by your PC using this method.
How Does this Method Works?
First, the Requirements:
1. An SD Card. 4GB at the least. A huger storage (8GB, 16GB) maybe demanded depending on your phone's file volume when it's unpacked.
2. Your device exact variant. NOTE: this is not needed if you are able to download it online. You can also request for yours on A B C PSR Suit Lab.
3. A full backup block (blk0) in .img format of another fully functional and working device. It must be your device exact variant. !Important.
Making A Bootable SD Card
How to Make A (Bootable) Live SD Card and Unbrick Qualcomm Devices
1. Get another exact variant of your device and INSERT an SD Card on it. The device chipset must be the same. Thus, if your device (bricked) is MSM8269, the required device CPU has to be MSM8269, too.
2. Root the working (exact variant) device and install Terminal Emulator on it.
3. Download and install Busybox on the device. You may download Busybox from here
4. Once BusyBox is installed, launch/open it and run/install its dependencies/files by clicking on the appropriate key.
5. Now, launch/open Terminal Emulator on the device and follow these procedures:
a. On Terminal EmulatorType:
suand hit/tap the Enter key. You will be prompted to GRANT Terminal emulator a Root Access, click GRANT.
b. Then, type:
dd if=/dev/block/mmcblk0 of=/sdcard/Loader.img bs=1024 count=168960and hit/tap the Enter key.
6. Wait few minutes or until Terminal Emulator completes the process.
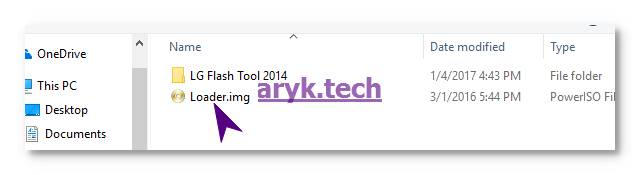
7. Now, check the Root Folder/Directory of the SD Card inserted on the phone. You will notice that a file named Loader.img has been created.
GOOD! That's your Qualcomm device Unbrick file. Copy the file onto your PC and continue to the step two (2) below.
strong>NOTE: What we have done in the steps above is that; we have copied all the necessary partition required to boot your Qualcomm android device and compressed it in a .img file. -file format that is widely supported by fastboot commands and can be flashed on SD Card
Now, here is how to flash Loader.img file we created from the first step on your SD Card.
How to Boot your Qualcomm Device from SD Card Using the File We Created
1. Get another SD Card and FORMAT it. !Important. You may also use the previous one but it must be formatted.
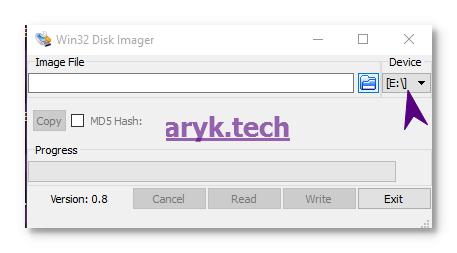
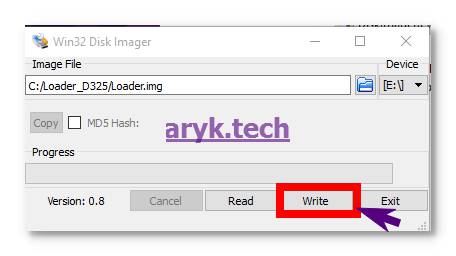
2. Download DiskImageRev2 from here and copy/move it onto your PC. This is the program that will be used to flash the partitions of Loader.img
3. Download and install your device specific drivers on your PC. Also, download and install QDLoader Drivers from here. !Important
4. Slot/Insert your SD Card in a card reader and connect it to your PC.
5. Go to the folder where you copied DiskImageRev2 which was downloaded from the step 2 above then, run/launch DiskimageRev.exe. preferably, as ADMIN

6. On launch, DISKIMAGEREV will detect display the drive where your SD Card is connected. If otherwise, browse to select the drive.
7. From DISKIMAGEREV, browse to the folder where you saved/copied the Loader.img file and select it.
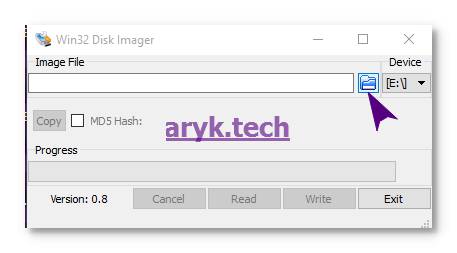
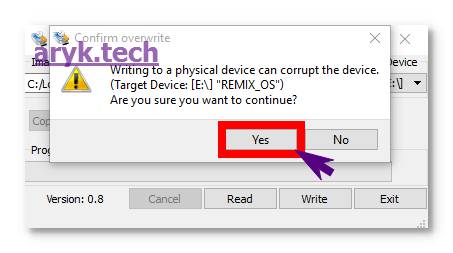
8. Now, click Write and wait until DISKIMAGEREV completes writig the files on the SD Card.
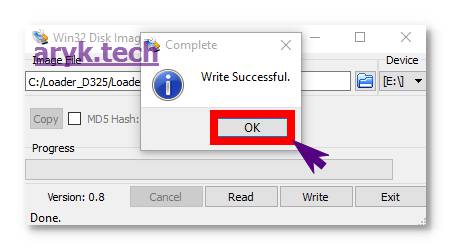
Once DISKIMAGEREV has successfully written the files on the SD Card, your SD Card is now bootable! You may now insert it on your bricked Qualcomm device and boot.
strong>How to Boot from the SD Card:
1. Take your bricked Qualcomm android device and remove the battery from it for few seconds. If the battery is sealed, just make sure the device is powered off for few seconds or minutes.
2. Slot/Insert the SD Card in your bricked Qualcomm device and press the Power button to switch on the device.
3. Wait few seconds. In some devices, the wait time could be minutes! Shortly, your bricked Qualcomm device will switch ON.
NOTE: the device will automatically go to Download Mode after some seconds and you can then flash Stock Firmware on the device using its official flash tools. E.g LG Mobile Supports tools for LG Devices, ZUK Recovery Tool for Lenovo, Oppo flash tools for Oppo device and so on.
You May Also Use this Method if;
1. your device does not charge or does not ON (Having BLANK screen).
2. Does not enter Recovery Mode or Download Mode
3. Finally, for all QHS-Dloader errors.

No comments:
Post a Comment