Tuesday, January 31, 2017

How to Unbrick (Debrick) Qualcomm Android Devices Using your SD Card

If you have stayed with different bricked Qualcomm Android devices long enough, you will understand that different solutions apply to different Qualcomm Android devices in different bricked state.

And more often than not, you may have to apply at least, 2 different unbrick (debrick) methods before most bricked Qualcomm devices could be recovered from the brick state.

Exaple

    Let's say you have a Xiaomi Redmi Note 3 (Pro) that's stuck at Qualcomm QHSUSB_Bulk or Qualcomm QDLoader 9008 bricked state and needs to be recovered.. First, you might have to get it out of the QHSUSB_Bulk mode first then, flash it using MiFlash, Tool Studio eMMC Download tool or QFIL (QPST) and that is if your Redmi Note 3 eMMC is not corrupted else, you'll have one more step to take!

That's enough an intro! Now, how can you unbrick (debrick) your Qualcomm android device using your SD Card?


What Does this Method Do?

1. This method turns your SD Card to a bootable partition that can be mounted by your device so that Qualcomm flash tools such as QFIL, TooL Studio and others can detect it.

2. Even completely DEAD Qualcomm android device will be awaken and be detected by your PC using this method.


How Does this Method Works?

First, the Requirements:

    1. An SD Card. 4GB at the least. A huger storage (8GB, 16GB) maybe demanded depending on your phone's file volume when it's unpacked.

    2. Your device exact variant. NOTE: this is not needed if you are able to download it online. You can also request for yours on A B C PSR Suit Lab.

    3. A full backup block (blk0) in .img format of another fully functional and working device. It must be your device exact variant. !Important.

Making A Bootable SD Card
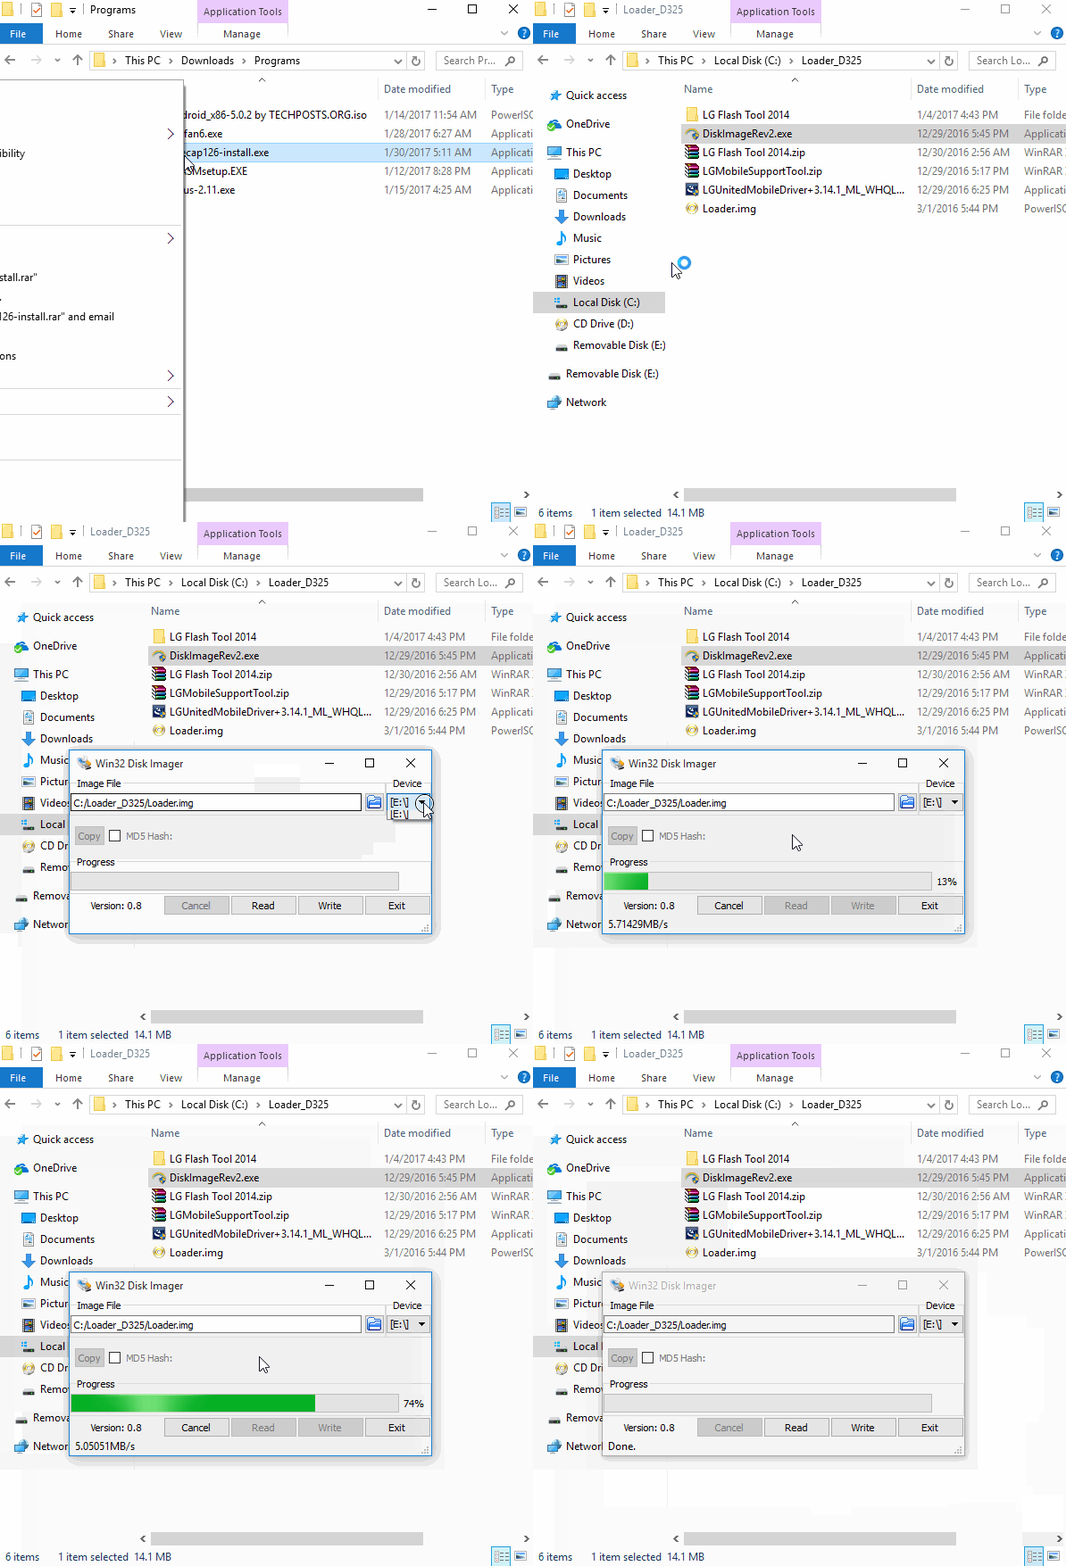
DiskImagerev is being used to write flash bootable SD Card

How to Make A (Bootable) Live SD Card and Unbrick Qualcomm Devices

1. Get another exact variant of your device and INSERT an SD Card on it. The device chipset must be the same. Thus, if your device (bricked) is MSM8269, the required device CPU has to be MSM8269, too.

2. Root the working (exact variant) device and install Terminal Emulator on it.

3. Download and install Busybox on the device. You may download Busybox from here

4. Once BusyBox is installed, launch/open it and run/install its dependencies/files by clicking on the appropriate key.

5. Now, launch/open Terminal Emulator on the device and follow these procedures:

a. On Terminal EmulatorType:

su
and hit/tap the Enter key. You will be prompted to GRANT Terminal emulator a Root Access, click GRANT.

b. Then, type:

dd if=/dev/block/mmcblk0 of=/sdcard/Loader.img bs=1024 count=168960
and hit/tap the Enter key.

6. Wait few minutes or until Terminal Emulator completes the process.

7. Now, check the Root Folder/Directory of the SD Card inserted on the phone. You will notice that a file named Loader.img has been created.

Qualcomm Device Unbrick .img File

GOOD! That's your Qualcomm device Unbrick file. Copy the file onto your PC and continue to the step two (2) below.


strong>NOTE: What we have done in the steps above is that; we have copied all the necessary partition required to boot your Qualcomm android device and compressed it in a .img file. -file format that is widely supported by fastboot commands and can be flashed on SD Card


Now, here is how to flash Loader.img file we created from the first step on your SD Card.


How to Boot your Qualcomm Device from SD Card Using the File We Created

1. Get another SD Card and FORMAT it. !Important. You may also use the previous one but it must be formatted.

2. Download DiskImageRev2 from here and copy/move it onto your PC. This is the program that will be used to flash the partitions of Loader.img

3. Download and install your device specific drivers on your PC. Also, download and install QDLoader Drivers from here. !Important

4. Slot/Insert your SD Card in a card reader and connect it to your PC.

5. Go to the folder where you copied DiskImageRev2 which was downloaded from the step 2 above then, run/launch DiskimageRev.exe. preferably, as ADMIN

Launch DiskImageRev as Admin

6. On launch, DISKIMAGEREV will detect display the drive where your SD Card is connected. If otherwise, browse to select the drive.
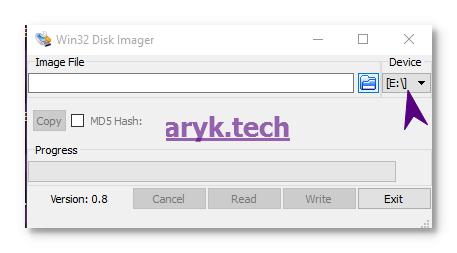
Select Drive to Flash

7. From DISKIMAGEREV, browse to the folder where you saved/copied the Loader.img file and select it.
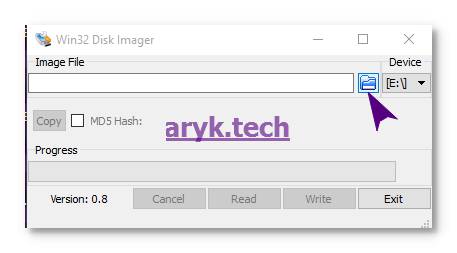
Select your Qualcomm Unbrick File Loader.img file
Qualcomm Device Unbrick File

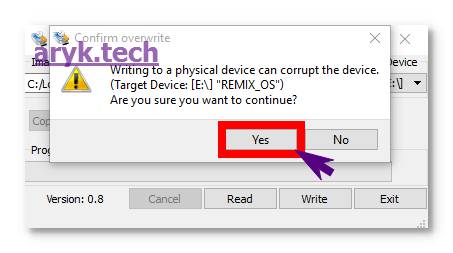
8. Now, click Write and wait until DISKIMAGEREV completes writig the files on the SD Card.

Write Flash Disk image
Select YES to COntinue

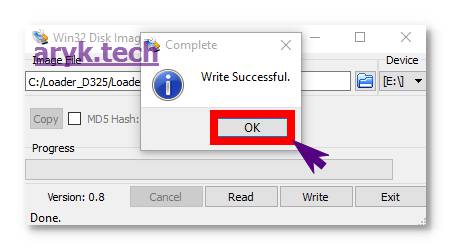
Once DISKIMAGEREV has successfully written the files on the SD Card, your SD Card is now bootable! You may now insert it on your bricked Qualcomm device and boot.

Disk Image Flash Write Successful

strong>How to Boot from the SD Card:

1. Take your bricked Qualcomm android device and remove the battery from it for few seconds. If the battery is sealed, just make sure the device is powered off for few seconds or minutes.

2. Slot/Insert the SD Card in your bricked Qualcomm device and press the Power button to switch on the device.

3. Wait few seconds. In some devices, the wait time could be minutes! Shortly, your bricked Qualcomm device will switch ON.


NOTE: the device will automatically go to Download Mode after some seconds and you can then flash Stock Firmware on the device using its official flash tools. E.g LG Mobile Supports tools for LG Devices, ZUK Recovery Tool for Lenovo, Oppo flash tools for Oppo device and so on.


You May Also Use this Method if;

1. your device does not charge or does not ON (Having BLANK screen).

2. Does not enter Recovery Mode or Download Mode

3. Finally, for all QHS-Dloader errors.

DiskImageRev2 -Download Page

DiskImageRev2 is a porpular Windows application that is used to write or flash .img files on SD Card or flash drive. This application becomes especially popular when the need to unbrick Qualcomm android devices using the SD Card (Live Suite) method is becoming common.


DiskRev2 Download Link

1. DiskRev2 Download (Mega Link)


How to Use DiskRev2

1. Get your Qualcomm device unbrick files ready. It should be .img format. You can Qualcomm devices unbrick files here.

2. Get an SD Card and FORMAT it. !Important.

3. Download DiskImageRev2 from the link above. Extract it using a ZIP/RAR extractor and copy/move it onto your PC.

4. Slot/Insert your SD Card in a card reader and connect it to your PC.

5. Go to the folder where you copied DiskImageRev2 which was downloaded earlier then, run/launch DiskimageRev.exe preferably, as ADMIN.

6. On launch, DISKIMAGEREV will detect display the drive where your SD Card is connected. If otherwise, browse to select the drive.

7. From DISKIMAGEREV, browse to the folder where you saved/copied the Loader.img file and select it.

8. Now, click Write and wait until DISKIMAGEREV completes writig the files on the SD Card.
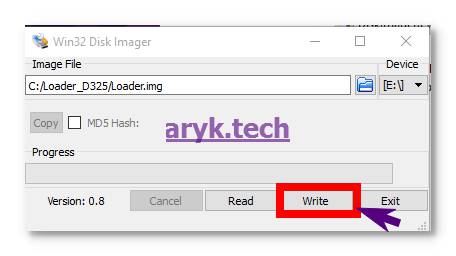
Once DISKIMAGEREV has successfully written the files on the SD Card, your SD Card is now bootable! You may now insert it on your bricked Qualcomm device and boot.

DiskImageRev2 Live operation

DiskImageRev2 being used to Write Flash img File On SD Card

ROM | Moto X2 | 7.1.1 | AOSP Extended Nougat v3.1 Oficial | Victara | 31/01

Nova ROM Nougat para o nosso Moto X 2014!

AOSP Extended é uma ROM com base no AOSP como o proprio nome já diz, e também possui algumas funções bem interessantes.

Características:

- DUI(Fling/Pulse/Smartbar)
- Substratum Theme Engine
- Inbuilt SuperSU
- Privacy Guard
- Expanded Desktop
- Dashboard suggestions/summaries (Enable/Disable)
- Statusbar Clock/Date customizations
- Statusbar Traffic Indicators
- Notification count
- Dt2s on Statusbar
- QS quick pulldown
- QS Brightness Slider(Enable/Disable)
- QS Tiles Animations
- Force expand notifications(Enable/Disable)
- Immersive Mode messages(Enable/Disable)
- Flashlight Notifications
- Immersive Recents
- Toast icon
- MediaScanner behaviour on boot
- Heads up Notifications(Enable/Disable)
- Power Menu Customizations
- Additional Battery Saver steps
- Volume Rocker tweaks(Wake/Music seek/Keyboard cursor control/Swap in landscape mode)
- Spanish Translations
- PT-BR Translations
- Update Fling Logo
- Add gestures back to settings app
- QS haptic feedback
- One tap data & Wifi tile
- Auto brightness icon toggle
- Breathing Notifications
- Clickable clock and date in statusbar header
- Long press gear icon in statusbar header launches Extensions
- Show 4G instead LTE switch
- Night Mode is back
- Night Mode QS Tile
- Long press caffeine tile action
- Customize QS Rows/Columns
- Customize small QS Tiles
- StatusBar brightness control
- Lockscreen Shortcut
- Double tap on lockscreen to sleep
- Quick Unlock for PIN/Password
- Battery Styles and percentage
- Change default file manager to MK Explorer
- Add FMRadio
- Add support for Jio4G Voice App
- Navbar QS Tile
- Flip Button Animation
- Unlink Notification volume
- Status bar clock Seconds
- Partial ScreenShot Type
- Screenshot Delay
- Slimperience browser
- Pixel's bootanimation(Experimantal)
- Pixel's UI(Navbar/Accent/Pixel launcher)
- OMS7
- Camera sound toggle
- Advance Ambient Display
- Longpress power button on lockscreen for torch
- Disable FC
- Wakelock Blocker
- Toggle Lockscreen Media Art
- Toggle Lockscreen music Visualizer
- Ticker
- Bluetooth QS tile easy toggle(one touch)
- CM's Eleven Music Player
- Disable QS on Lockscreen
- Invert Ambient display's Color
- Toggle Dynamic notification card's color
- Low Battery Notification Toggle
- Hide Clock/Date/Alarm text from lockscreen
- Lockscreen Clock's Font customizations
- Weather on lockscreen
- And many more coming in future!

Screenshots:

Utilizando o tema ModernUI


Imagens por: Anderson Mendes

Instalação:

1. Baixe a ROM e o GApps;
2. Coloque ambos na memória interna do seu Moto X;
3. Reinicie no modo Recovery;
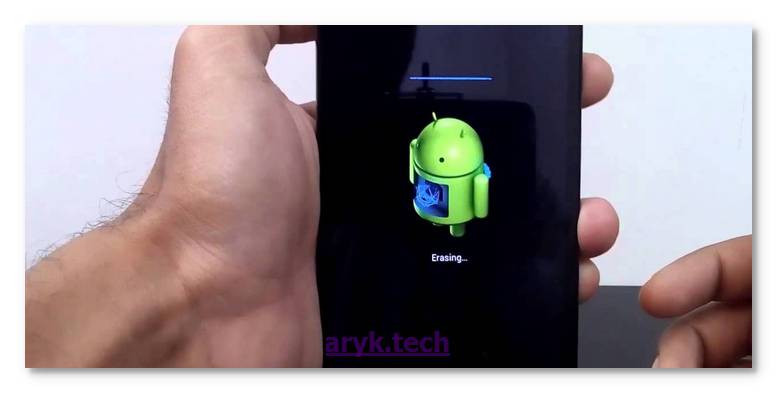
4. Vá em Wipe > Advanced Wipe e selecione: System, cache, data e dalvik-cache;
5. Confirme o Wipe;
6. Vá em Install e selecione a ROM e confirme, depois selecione o GApps e confirme;
7. Agora vá em Reboot > System

Downloads:


AOSP Extended v3.1 Oficial | 31/01

Dynamic Gapps

Créditos:

Samsung Galaxy Tab S3 is coming


In news that will please Samsung fans, it seems the Samsung Galaxy Tab S3 is set to be showcased at the Mobile World Congress (MWC) 2017. 

This is after it received certification from Federal Communications Commission (FCC) in the U.S


With that sorted, what do we know about the impending Samsung Galaxy Tab S3? Well it is expected to come in two variants that's one. 

One of the variants is said to be a Wi-Fi only system that has a model number of SM-T820 and the other variant of SM-T825 will support both Wi-Fi and LTE connectivity. According to Price Raja, the SM-T825 variant has received FCC's approval.
READ: FIRST IMAGE OF SAMSUNG S8 LEAKED

Also from the FCC data, a sketch of the rear side of the device has surfaced which shows a camera.

As for what's under the hood, one of the variants is to be powered by Snapdragon 820 chipset while the other one would be running on Exynos 7420 chipset. Both the processors are coupled with 4 GB of RAM. The tablet will be arriving with a 9.7-inch display that would carry 2,048 x 1,536 pixels.


As for the hard drive size, the Galaxy Tab S3 will have 32 GB out of which it will provide 24 GB of storage space to the users. As for the rear camera it is reported to be a 12-megapixel while the front camera will be of 5-megapixel. 

The tablet would be arriving preinstalled with Android 7.0 Nougat OS and it is pegged to include a USB Type-C port.
It was speculated that the Galaxy Tab S3 release was scrapped last year because of the Galaxy Note 7 fiasco which occurred in September.

All rumours point to the Tablet being launched in the first quarter of this year.

How to Flash TWRP on Lenovo a516 without PC


Your Phone Must Root  

TWRP Image 1

1. Install Mobileuncle MTK Tools (Download in Play Store)
2. Download TWRP here3. Extract file zip and put file recovery.img to sdcard outside a folder 
4. Open MobileUncle Tools - Select the Recovery Update - Select the recovery.img on sdcard - Select OK
5. Wait until mobileuncle finished installing TWRP, When finished select go into recovery.

Trump's Next Executive order could Hit Tech companies hard


America's President Donald Trump has somehow incensed the entire world again this time with his restriction on Immigration from certain countries that are largely Islamic.

Since then there have been a ton of protests from people all over against the move, but from the looks of things, this may only be the start.


According to Bloomberg, a new executive order set to be launched will crack down on the work visa program in the US. Foreign work visas, known as H-1B visas, are important to the hiring practices of US tech companies like Apple, Google and Microsoft.

If the order goes through, companies could have to change hiring practices and attempt to find employees in the US first before seeking workers internationally, according to the report. Seeing as a lot of tech talent comes from overseas, this could hit tech companies who hire a lot of foreign talent.


The move will most likely elicit robust responses from tech companies who have been very vocal in their displeasure of the immigration restriction by the US government.

So it remains to be seen when the law could go into action, but it sure seems that there's a storm.

Monday, January 30, 2017

ROM | Moto X2 | 7.1.1 | Reaper OS Beta 5 Oficial | Victara | 26/01

Mais uma nova ROM, dos mesmos criadores da Broken OS!


Ainda não há descrições da ROM.

Screenshots:


Instalação:

1. Baixe a ROM e o GApps;
2. Coloque ambos na memória interna do seu Moto X;
3. Reinicie no modo Recovery;
4. Vá em Wipe > Advanced Wipe e selecione: System, cache, data e dalvik-cache;
5. Confirme o Wipe;
6. Vá em Install e selecione a ROM e confirme, depois selecione o GApps e confirme;
7. Agora vá em Reboot > System

Downloads:


Reaper OS Beta 5 | 26/01

Dynamic Gapps

Créditos:

- Jesse Smith

How your Pattern Lock on Android can be cracked in just 5 attempts


Feeling safe with the Pattern lock on your Android phone? Think again! If you feel secure with your Android phone's lock pattern, think again. 

According to a new report from Tech times, a group of researchers from the Lancaster University, Northwest University in China, and the University of Bath found out that Android's pattern lock system can be cracked in just five attempts. 

What's worse? the more complex your pattern, the easier it is to crack. Yes, i kid you not.

The Pattern Lock is one of three security levels on the common Android phone. There's just the swipe screen and also the security code. The Lock Pattern is often described as a mid-level security measure, not too easy to crack but also not the safest.


According to the report, researchers have through the use of a sophisticated algorithm software, been able to crack the code by filming and analyzing fingertip movements and positioning of the device. Researchers used 120 unique patterns that were collected from different users and were able to figure out more than 95% of the patterns in just 5 attempts.

There is general worry that this method of cracking your code would enable thieves to obtain personal information from stolen phones. This algorithm can also be used by attackers across the room inside a busy café or a restaurant.

According to 
Dr. Zheng Wang of Lancaster University "Pattern lock is a very popular protection method for Android devices. As well as for locking their devices, people tend to use complex patterns for important financial transactions such as online banking and shopping because they believe it is a secure system,

"However, our findings suggest that using Pattern Lock to protect sensitive information could actually be very risky."


The group also remarkably found that the more complicated a pattern, the easier it is to crack because they narrow down the possible options. Guixin Ye, a researcher from Northwest University, added that it might even be safer to use shorter, simpler patterns instead of the more complex ones.


So perhaps when next you want to sort security for your Android phone, you can use a pin code instead or if you insist on patterns then at least try hiding it whenever you want to access your phone.

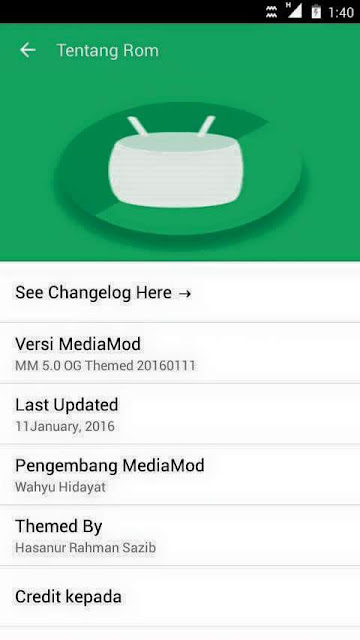
[ROM] MediaMod v5 Green Edition for Lenovo a516

Download: MediaMod Rom
Instruksi:
• Download ROM
• Install via TWRP
MediaMod Image 2
MediaMod Image 1

Even The British Military Prefer the iPhone 7 to the Android


The debate as to which OS trumps the other between the Google's Android and Apple's OS will continue to rage as long as both systems exists, it does seem that Apple is winning-- or at least they are in the eyes of the British military.

According to a new report from TechRepublic, the UK Ministry of Defence recently have chosen Apple’s iPhone 7 as the “device of choice” for sensitive communications that warrant the utmost security against malicious actors.

Also reported is that BT, England's communication giant is already doing their utmost to heighten the security safeguards on the iPhone 7 for military and defense personnel. 

Once done, the users of these secured iPhones will be able to adjust the security mode of their device depending on the level of sensitivity a particular communication demands. The report also adds that BT is also working on methods to develop “secure storage containers” for top-secret data.

From the looks of things though it seems like the initial plan was to work with the Samsung Note 4. According to Steve Bunn, BT’s technical business manager for defence, work on a secured communications device was initially with Samsung.

“But as more and more development and testing was done,” Bunn explained, “the security associated with it wasn’t deemed to be sufficient, so that’s why we moved [to iPhone].”

Now this seems like a slight on Samsung, so to make nice BT issued a follow-up statement indicating that the Note 4’s security wasn’t inadequate.

“We would like to clarify that the MoD has not expressed any views about the suitability of dual-persona technology from specific handset/technology vendors and is prototyping a range of devices,”

So which OS do you think is more secure, the Android or Apple's OS?

Sunday, January 29, 2017

How to Hard Reset Infinix Alpha Marvel-x502

More often than not, you will need to wipe, factory reset or format your Infinix Alpha Marvel-x502 when you forget the password, pattern lock or any other security barriers you may have set on your Alpha Marvel-x502 to prevent unauthorised third-party access to your device.

It may also be necessary that you format, factory reset or wipe your Infinix Alpha Marvel-x502 especially, when you notice a sudden change in your Infinix Alpha Marvel-x502 performances in terms of its speed or level of applications deficiency.


Factory Reset Infinix Alpha Marvel-x502

Here, I discuss the step by step procedures involved in wiping, factory reset or formatting your Infinix Alpha Marvel-x502. NOTE: I- the methods discussed herein will erase all the data on your Infinix Alpha Marvel-x502, therefore, if need be, you should backup every necessary data on your Infinix Alpha Marvel-x502 before you proceed. II- Your Infinix Alpha Marvel-x502 may also end up getting stuck at FRP. FRP Lock which is an acronym for Factory Reset Protcetion is a security meansure that restricts access to your android device following a factory reset, hard reset or wipe.


How to Factory Reset your Infinix Alpha Marvel-x502

1. Power off your Infinix Alpha Marvel-x502. You may do this by pressing and holding the Power Button. If the battery can be removed by you, then; that's also an option.

Factory Reset Alpha Marvel-x502 -Step 1

2. Now, press and hold Volume Down (-) and Power Button for few seconds or until Engineering Mode appears on your Alpha Marvel-x502 screen.

Factory Reset Alpha Marvel-x502 -Step 2

3. As soon as Engineering Mode appears on your Alpha Marvel-x502 screen, release both keys that were held down in Step 2 above.

4. Using Volume Keys to navigate, select Factory Reset / Wipe All Data then, use Power Key to make your selection.

5. Scroll down to Confirm your selection.

6. You may now wait patiently for your Infinix Alpha Marvel-x502 to initialize and complete the Factory Reset/Data Wipe Operation.


NOTE:

1. At the Step 3, you may use combination of both POWER KEY and VOLUME UP (+) KEY.

2. In some Infinix android devices, Clear EMMC appears instead of Factory Reset / Wipe All Data.


How to Format (Wipe) your Infinix Alpha Marvel-x502: Method 2

1. If your Infinix Alpha Marvel-x502 is Switched off, begin by Switching On the phone.

Format Wipe Alpha Marvel-x502 -Step 1

2. From your Infinix Alpha Marvel-x502 go to Settings > Backup & Reset.

3. Tap Factory Data Reset then, select Reset Device.

4. Choose Reset Phone / Erase Everything. Be sure that all the data on your Infinix Alpha Marvel-x502 will be erased/formatted following this step.

5. Select OK to confirm the whole process.

6. Now, wait patiently while your Infinix Alpha Marvel-x502 initializes and performs the Data Wipe (Factory Reset) operation until it is completed.

When the whole process is complete, your Infinix Alpha Marvel-x502 will be rebooted hence, your Infinix Alpha Marvel-x502 has been reseted to factory defaults settings and you are now welcomed by the brand new Alpha Marvel-x502.


If after wiping or formating your Alpha Marvel-x502, you still encounter issues or find yourself at FRP Lock screen, you could use these tutorials to help yourself out.

Lenovo A7010 Stock ROM Firmware (Flash File) Download

Lenovo Android Stock ROM Firmware Flash File

Here is a Lenovo A7010 Stock ROM Firmware which can be used to load and flash stock firmware on any Lenovo A7010 of this exact variant. Any MTK Flash tools can download and flash this Lenovo A7010 flash file on your A7010 so long as that MTK Flash Tool supports MTK Scatter File.


Since most major software malfunctions on any MTK Android devices can only be corrected by flashing, this A7010 flash file, if Miniperly used, can unbrick (debrick) your A7010 and also corrects any software issues your Lenovo A7010 may currently have. Also, keep in mind that when you load stock firmware on your Lenovo A7010 using any MTK flash tool, your Lenovo A7010 will be reset to factory defaults settings and by that, definately, your UserData will be lost including contacts, messages and others.


Note: If your A7010 is already bricked and you want to unbrick it, you will need to pay closer attention to the tutorials contained below here.


Lenovo A7010 Stock ROM Firmware Download Link(s)

1. Lenovo A7010 (A48 S143 151218 ROW) Stock ROM

2. Lenovo A7010 (A48 S147 160113 ROW) Stock ROM

3. Lenovo A7010 (A48 S152 160302 ROW) Stock ROM

4. Lenovo A7010 (A48 S219 160810 ROW) Stock ROM

5. Lenovo A7010 (A48 S230 161129 ROW) Stock ROM

6. Lenovo A7010 (A48 S232 161227 ROW) Stock ROM


How to Flash Stock Firmware On Lenovo A7010

1. Download your Lenovo A7010 stock ROM firmware from the link above.


2. Extract the Lenovo A7010 Firmware you downloaded from the link above onto a folder on your PC.


3. Download and install MTK android device drivers on your PC. You may skip this step if you have installed MTK drivers on your PC already otherwise, download MTK drivers here


4. Now, choose either of the tools listed below here to load the stock firmware on your Lenovo A7010 .


See video tutorial here: How to Flash MTK Android Devices Video Tutorial


Note

1. Each of the tools listed above contained step by step guides with illustrated pictures on how to flash stock firmware on your Lenovo A7010 .

2. If your device is bricked already, I recommend that you use NCK Box or SP Flash. Both are the safest toolS for flashing MTK Android devices.

3. If you require any further assistance, simply drop your comment detailing the issue(s) and I shall help you revive your Lenovo A7010 , if need be.

Lemon P102 Stock ROM Firmware (Flash File) Download

Lemon Android Stock ROM Firmware Flash File

Here is a Lemon P102 Stock ROM Firmware which can be used to load and flash stock firmware on any Lemon P102 of this exact variant. Any MTK Flash tools can download and flash this Lemon P102 flash file on your P102 so long as that MTK Flash Tool supports MTK Scatter File.


Since most major software malfunctions on any MTK Android devices can only be corrected by flashing, this P102 flash file, if Miniperly used, can unbrick (debrick) your P102 and also corrects any software issues your Lemon P102 may currently have. Also, keep in mind that when you load stock firmware on your Lemon P102 using any MTK flash tool, your Lemon P102 will be reset to factory defaults settings and by that, definately, your UserData will be lost including contacts, messages and others.


Note: If your P102 is already bricked and you want to unbrick it, you will need to pay closer attention to the tutorials contained below here.


Lemon P102 Stock ROM Firmware Download Link(s)

1. Lemon P102 (V1 0130403) Stock ROM


How to Flash Stock Firmware On Lemon P102

1. Download your Lemon P102 stock ROM firmware from the link above.


2. Extract the Lemon P102 Firmware you downloaded from the link above onto a folder on your PC.


3. Download and install MTK android device drivers on your PC. You may skip this step if you have installed MTK drivers on your PC already otherwise, download MTK drivers here


4. Now, choose either of the tools listed below here to load the stock firmware on your Lemon P102 .


See video tutorial here: How to Flash MTK Android Devices Video Tutorial


Note

1. Each of the tools listed above contained step by step guides with illustrated pictures on how to flash stock firmware on your Lemon P102 .

2. If your device is bricked already, I recommend that you use NCK Box or SP Flash. Both are the safest toolS for flashing MTK Android devices.

3. If you require any further assistance, simply drop your comment detailing the issue(s) and I shall help you revive your Lemon P102 , if need be.

Intex Aqua 5 Stock ROM Firmware (Flash File) Download

Intex Android Stock ROM Firmware Flash File

Here is a Intex Aqua 5 Stock ROM Firmware which can be used to load and flash stock firmware on any Intex Aqua 5 of this exact variant. Any MTK Flash tools can download and flash this Intex Aqua 5 flash file on your Aqua 5 so long as that MTK Flash Tool supports MTK Scatter File.


Since most major software malfunctions on any MTK Android devices can only be corrected by flashing, this Aqua 5 flash file, if Miniperly used, can unbrick (debrick) your Aqua 5 and also corrects any software issues your Intex Aqua 5 may currently have. Also, keep in mind that when you load stock firmware on your Intex Aqua 5 using any MTK flash tool, your Intex Aqua 5 will be reset to factory defaults settings and by that, definately, your UserData will be lost including contacts, messages and others.


Note: If your Aqua 5 is already bricked and you want to unbrick it, you will need to pay closer attention to the tutorials contained below here.


Intex Aqua 5 Stock ROM Firmware Download Link(s)

1. Intex Aqua 5 (v13) Stock ROM


How to Flash Stock Firmware On Intex Aqua 5

1. Download your Intex Aqua 5 stock ROM firmware from the link above.


2. Extract the Intex Aqua 5 Firmware you downloaded from the link above onto a folder on your PC.


3. Download and install MTK android device drivers on your PC. You may skip this step if you have installed MTK drivers on your PC already otherwise, download MTK drivers here


4. Now, choose either of the tools listed below here to load the stock firmware on your Intex Aqua 5 .


See video tutorial here: How to Flash MTK Android Devices Video Tutorial


Note

1. Each of the tools listed above contained step by step guides with illustrated pictures on how to flash stock firmware on your Intex Aqua 5 .

2. If your device is bricked already, I recommend that you use NCK Box or SP Flash. Both are the safest toolS for flashing MTK Android devices.

3. If you require any further assistance, simply drop your comment detailing the issue(s) and I shall help you revive your Intex Aqua 5 , if need be.

How to Hard Reset Infinix Race Eagle

More often than not, you will need to wipe, factory reset or format your Infinix Race Eagle when you forget the password, pattern lock or any other security barriers you may have set on your Race Eagle to prevent unauthorised third-party access to your device.

It may also be necessary that you format, factory reset or wipe your Infinix Race Eagle especially, when you notice a sudden change in your Infinix Race Eagle performances in terms of its speed or level of applications deficiency.


Factory Reset Infinix Race Eagle

Here, I discuss the step by step procedures involved in wiping, factory reset or formatting your Infinix Race Eagle. NOTE: I- the methods discussed herein will erase all the data on your Infinix Race Eagle, therefore, if need be, you should backup every necessary data on your Infinix Race Eagle before you proceed. II- Your Infinix Race Eagle may also end up getting stuck at FRP. FRP Lock which is an acronym for Factory Reset Protcetion is a security meansure that restricts access to your android device following a factory reset, hard reset or wipe.


How to Factory Reset your Infinix Race Eagle

1. Power off your Infinix Race Eagle. You may do this by pressing and holding the Power Button. If the battery can be removed by you, then; that's also an option.

Factory Reset Race Eagle -Step 1

2. Now, press and hold Volume Down (-) and Power Button for few seconds or until Engineering Mode appears on your Race Eagle screen.

Factory Reset Race Eagle -Step 2

3. As soon as Engineering Mode appears on your Race Eagle screen, release both keys that were held down in Step 2 above.

4. Using Volume Keys to navigate, select Factory Reset / Wipe All Data then, use Power Key to make your selection.

5. Scroll down to Confirm your selection.

6. You may now wait patiently for your Infinix Race Eagle to initialize and complete the Factory Reset/Data Wipe Operation.


NOTE:

1. At the Step 3, you may use combination of both POWER KEY and VOLUME UP (+) KEY.

2. In some Infinix android devices, Clear EMMC appears instead of Factory Reset / Wipe All Data.


How to Format (Wipe) your Infinix Race Eagle: Method 2

1. If your Infinix Race Eagle is Switched off, begin by Switching On the phone.

Format Wipe Race Eagle -Step 1

2. From your Infinix Race Eagle go to Settings > Backup & Reset.

3. Tap Factory Data Reset then, select Reset Device.

4. Choose Reset Phone / Erase Everything. Be sure that all the data on your Infinix Race Eagle will be erased/formatted following this step.

5. Select OK to confirm the whole process.

6. Now, wait patiently while your Infinix Race Eagle initializes and performs the Data Wipe (Factory Reset) operation until it is completed.

When the whole process is complete, your Infinix Race Eagle will be rebooted hence, your Infinix Race Eagle has been reseted to factory defaults settings and you are now welcomed by the brand new Race Eagle.


If after wiping or formating your Race Eagle, you still encounter issues or find yourself at FRP Lock screen, you could use these tutorials to help yourself out.

Lenovo A936 Stock ROM Firmware (Flash File) Download

Lenovo Android Stock ROM Firmware Flash File

Here is a Lenovo A936 Stock ROM Firmware which can be used to load and flash stock firmware on any Lenovo A936 of this exact variant. Any MTK Flash tools can download and flash this Lenovo A936 flash file on your A936 so long as that MTK Flash Tool supports MTK Scatter File.


Since most major software malfunctions on any MTK Android devices can only be corrected by flashing, this A936 flash file, if Miniperly used, can unbrick (debrick) your A936 and also corrects any software issues your Lenovo A936 may currently have. Also, keep in mind that when you load stock firmware on your Lenovo A936 using any MTK flash tool, your Lenovo A936 will be reset to factory defaults settings and by that, definately, your UserData will be lost including contacts, messages and others.


Note: If your A936 is already bricked and you want to unbrick it, you will need to pay closer attention to the tutorials contained below here.


Lenovo A936 Stock ROM Firmware Download Link(s)

1. Lenovo A936 (USR ST1505 5.30.1 1501271757 MP13 V1.1 CU CN) Stock ROM


How to Flash Stock Firmware On Lenovo A936

1. Download your Lenovo A936 stock ROM firmware from the link above.


2. Extract the Lenovo A936 Firmware you downloaded from the link above onto a folder on your PC.


3. Download and install MTK android device drivers on your PC. You may skip this step if you have installed MTK drivers on your PC already otherwise, download MTK drivers here


4. Now, choose either of the tools listed below here to load the stock firmware on your Lenovo A936 .


See video tutorial here: How to Flash MTK Android Devices Video Tutorial


Note

1. Each of the tools listed above contained step by step guides with illustrated pictures on how to flash stock firmware on your Lenovo A936 .

2. If your device is bricked already, I recommend that you use NCK Box or SP Flash. Both are the safest toolS for flashing MTK Android devices.

3. If you require any further assistance, simply drop your comment detailing the issue(s) and I shall help you revive your Lenovo A936 , if need be.

Lemon P101 Stock ROM Firmware (Flash File) Download

Lemon Android Stock ROM Firmware Flash File

Here is a Lemon P101 Stock ROM Firmware which can be used to load and flash stock firmware on any Lemon P101 of this exact variant. Any MTK Flash tools can download and flash this Lemon P101 flash file on your P101 so long as that MTK Flash Tool supports MTK Scatter File.


Since most major software malfunctions on any MTK Android devices can only be corrected by flashing, this P101 flash file, if Miniperly used, can unbrick (debrick) your P101 and also corrects any software issues your Lemon P101 may currently have. Also, keep in mind that when you load stock firmware on your Lemon P101 using any MTK flash tool, your Lemon P101 will be reset to factory defaults settings and by that, definately, your UserData will be lost including contacts, messages and others.


Note: If your P101 is already bricked and you want to unbrick it, you will need to pay closer attention to the tutorials contained below here.


Lemon P101 Stock ROM Firmware Download Link(s)

1. Lemon P101 (v04 20130329 2044) Stock ROM


How to Flash Stock Firmware On Lemon P101

1. Download your Lemon P101 stock ROM firmware from the link above.


2. Extract the Lemon P101 Firmware you downloaded from the link above onto a folder on your PC.


3. Download and install MTK android device drivers on your PC. You may skip this step if you have installed MTK drivers on your PC already otherwise, download MTK drivers here


4. Now, choose either of the tools listed below here to load the stock firmware on your Lemon P101 .


See video tutorial here: How to Flash MTK Android Devices Video Tutorial


Note

1. Each of the tools listed above contained step by step guides with illustrated pictures on how to flash stock firmware on your Lemon P101 .

2. If your device is bricked already, I recommend that you use NCK Box or SP Flash. Both are the safest toolS for flashing MTK Android devices.

3. If you require any further assistance, simply drop your comment detailing the issue(s) and I shall help you revive your Lemon P101 , if need be.

Intex Aqua Active Stock ROM Firmware (Flash File) Download

Intex Android Stock ROM Firmware Flash File

To flash your Intex Aqua Active, you need to download the Intex Aqua Active stock ROM whose download link is enclosed within here, then, follow the step by step instructions below to flash stock firmware on your Intex Aqua Active.

Please note that flashing this Stock ROM Firmware on your Intex Aqua Active will format and restore your device to factory defaults settings, hence, making you loose all the files therein. Therefore, you are advised to make a backup if you need to retain your files and data.


Note: If your Aqua Active is already bricked and you want to unbrick it, you will need to pay closer attention to the tutorials contained below here.


Intex Aqua Active Stock ROM Firmware Download Link(s)

1. Intex Aqua Active (v1.0.2) Stock Firmware

2. Intex Aqua Active (v9 Indian SER) Stock Firmware

3. Intex Aqua Active (v10 Indian SER) Stock Firmware


How to Flash Stock Firmware On Intex Aqua Active

1. Download your Intex Aqua Active stock ROM firmware from the link above.


2. Extract the Intex Aqua Active Firmware you downloaded from the link above onto a folder on your PC.


3. Download and install Spreadtrum android device drivers on your PC. You may skip this step if you have installed spreadtrum drivers on your PC already otherwise, download SPD drivers from here


4. Now, choose either of the tools listed below here to load the stock firmware on your Intex Aqua Active.


Note

1. Each of the tools listed above contained step by step guides with illustrated pictures on how to flash stock firmware on your Intex Aqua Active.

2. If you require any further assistance, simply drop your comment detailing the issue(s) and I shall help you revive your Intex Aqua Active, if need be.

How to Hard Reset Infinix JoyPAD 8-X800

More often than not, you will need to wipe, factory reset or format your Infinix JoyPAD 8-X800 when you forget the password, pattern lock or any other security barriers you may have set on your JoyPAD 8-X800 to prevent unauthorised third-party access to your device.

It may also be necessary that you format, factory reset or wipe your Infinix JoyPAD 8-X800 especially, when you notice a sudden change in your Infinix JoyPAD 8-X800 performances in terms of its speed or level of applications deficiency.


Factory Reset Infinix JoyPAD 8-X800

Here, I discuss the step by step procedures involved in wiping, factory reset or formatting your Infinix JoyPAD 8-X800. NOTE: I- the methods discussed herein will erase all the data on your Infinix JoyPAD 8-X800, therefore, if need be, you should backup every necessary data on your Infinix JoyPAD 8-X800 before you proceed. II- Your Infinix JoyPAD 8-X800 may also end up getting stuck at FRP. FRP Lock which is an acronym for Factory Reset Protcetion is a security meansure that restricts access to your android device following a factory reset, hard reset or wipe.


How to Factory Reset your Infinix JoyPAD 8-X800

1. Power off your Infinix JoyPAD 8-X800. You may do this by pressing and holding the Power Button. If the battery can be removed by you, then; that's also an option.

Factory Reset JoyPAD 8-X800 -Step 1

2. Now, press and hold Volume Down (-) and Power Button for few seconds or until Engineering Mode appears on your JoyPAD 8-X800 screen.

Factory Reset JoyPAD 8-X800 -Step 2

3. As soon as Engineering Mode appears on your JoyPAD 8-X800 screen, release both keys that were held down in Step 2 above.

4. Using Volume Keys to navigate, select Factory Reset / Wipe All Data then, use Power Key to make your selection.

5. Scroll down to Confirm your selection.

6. You may now wait patiently for your Infinix JoyPAD 8-X800 to initialize and complete the Factory Reset/Data Wipe Operation.


NOTE:

1. At the Step 3, you may use combination of both POWER KEY and VOLUME UP (+) KEY.

2. In some Infinix android devices, Clear EMMC appears instead of Factory Reset / Wipe All Data.


How to Format (Wipe) your Infinix JoyPAD 8-X800: Method 2

1. If your Infinix JoyPAD 8-X800 is Switched off, begin by Switching On the phone.

Format Wipe JoyPAD 8-X800 -Step 1

2. From your Infinix JoyPAD 8-X800 go to Settings > Backup & Reset.

3. Tap Factory Data Reset then, select Reset Device.

4. Choose Reset Phone / Erase Everything. Be sure that all the data on your Infinix JoyPAD 8-X800 will be erased/formatted following this step.

5. Select OK to confirm the whole process.

6. Now, wait patiently while your Infinix JoyPAD 8-X800 initializes and performs the Data Wipe (Factory Reset) operation until it is completed.

When the whole process is complete, your Infinix JoyPAD 8-X800 will be rebooted hence, your Infinix JoyPAD 8-X800 has been reseted to factory defaults settings and you are now welcomed by the brand new JoyPAD 8-X800.


If after wiping or formating your JoyPAD 8-X800, you still encounter issues or find yourself at FRP Lock screen, you could use these tutorials to help yourself out.